Birds are singing, tin pots are clanking and the air is cool. It’s the magic hour at the campground. 7 AM. Kids are still asleep. The noisy neighbors who were shooting fireworks haven’t woken up from their Natty Ice induced coma and the RVers haven’t arisen to turn on their generators and electrify their toasters for a fresh pop tart.
This is when I make coffee. Camping coffee is an inevitable compromise. It’s never exactly the same as at home, yet is always more satisfying—to brew, and pour and sit by the smoldering embers of last nights fire and listen to the natural world boot up for the day is sublime.
But there is the chore of making coffee. And there are many ways of doing that. Here are a few, some more involved than others, that I use regularly. Each produces great camping coffee.
Stanley Mountain Vacuum Coffee System
The Stanley Mountain Vacuum Coffee System is basically a french press that you can boil the water in with a vacuum bottle nested in it for storing the coffee. I’ve been wanting a vacuum bottle for camping because I like to drink my camping coffee in smaller portions rather than in a big 20 OZ cup like I do at home. To that end, the Stanley MVCS has two cups in the lid, and the bottle plug holds 50 grams of ground coffee. So if fully charged with water and coffee grounds, all you need is a stove.
The Stanley boiling pot is nice and big and you can boil a whole liter of water in it without it spilling over the rim. The french press component makes a good seal and filters the coffee pretty well.
You need to use COARSE ground coffee with any french press which is sort of a problem because you can’t get anything but regular grind at the grocery store these days, and whole bean coffee is getting harder to find in grocery stores. But if you buy from a local roaster, grind at home and plan ahead you’ll have no problem. Long term overlanders might have to get it ground at a shop; perhaps even the ubiquitous coffee shop of the Two-Tailed Mermaid…
Jet Boil French Press
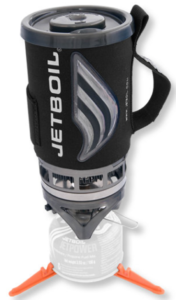
While the Stanley MVCS has everything you need for coffee but the stove, the Jetboil Flash Personal Cooking System is the stove pot and and the french press. I bought my Jet boil over 10 years ago and it is still raging, so it’s a good product. I used it on our Death Valley Adventure for making coffee so I wouldn’t have to get the stove out in the morning.
The 1 liter boiling pot is hard anodized aluminum with a heat exchanger on the bottom, a neoprene sleeve around it and a rubber lid. The extra french press plunger and turns the whole setup into a good french press.
The jet boil will boil your coffee water in VERY short order. At reasonable elevations it’ll boil 2 cups of water in less than 2 minutes.
The downside is that’s not really enough for two servings of coffee. But it makes good coffee and is easy to just make another batch. And while you could use the Jetboil after you make the coffee boil water for oatmeal, you have to clean it, and your oatmeal will probably taste kinda coffeeish.
Pour-over Coffee
The best way to make coffee anywhere is by the pour-over method. This is a system much like a standard drip coffee maker except the filter funnel sits on top of your cup and you pour the coffee through it out of a kettle.
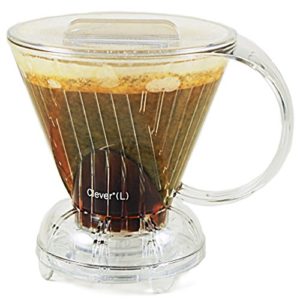
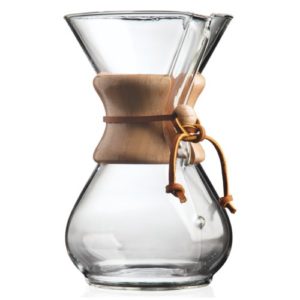
There are any number of great pour over brewers, but my two favorites are 1) Chemex Coffee Maker and 2) Sweet Maria’s Clever Coffee Dripper. If you brew the coffee in two pours, meaning you pour/brew, let it drain and pour/brew the remainder of your water, making sure to completely wet all the grounds, you’ll get the best coffee.
One caveat is that while the Chemex will make the better coffee of the two, there are two downsides: 1) they are made of glass and 2) you have to buy the Chemex filters, because regular filters will blow out. Both will brew coffee shop quality coffee. I’ve never actually take this setup camping because I already know I’ll break it.
MSR Mug Mate
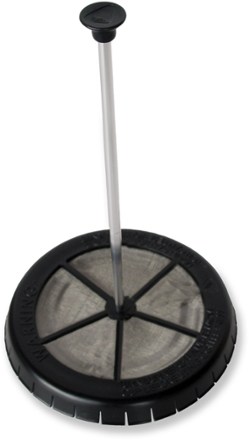
The MSR Mug Mate one is the smallest, easiest way to make good coffee anywhere. It’s a plastic and wire mesh filter cup that you fill with coffee grounds, set in the rim of your cup and pour boiling water through.
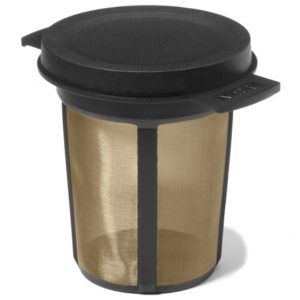 For the ease of use and compact size, it can’t be beat and I’ve been using it all summer. Downsides: It’s small, doesn’t make more than 8 oz ideally, and you can stretch it to 16oz. But for a full two servings, you’ll have to run it twice. Also, it passes a lot of grit, mostly over the side because it’s hard to see straight before you’ve had coffee. I’m not the biggest fan of gritty coffee.
All in all, it’s a great cup of coffee.
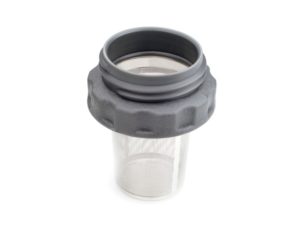 BONUS: a similar product, that I have not tested, but that would go well with my HydroFlask bottles is the GSI H2Jo Wide-Mouth Water Bottle Coffee Maker. Looks like it screws on to any Nalgine style water bottle and brews coffee or tea by pouring water through the grounds. Looks like this one would be harder to get grit into the bottle…
Two Tailed Mermaid Instant Coffee
I’m ashamed to admit that I sometimes use instant coffee packs from the coffee chain that friends aren’t supposed to let friends drink. Sorry: not sorry.
The Via coffee packs are not bad. For how easy they are they are excellent. For backpacking, light car camping, or any time I’m the only one drinking the coffee I’ll use them. I can deal with the slightly off taste, but only because they are super easy. Just boil, pour mix and you’re done.
I’ve tried store brand instant coffee packets. They are awful. Like Sanka or Folgers crystals level bad. If you like Sanka or Folgers, then I’m not sure why you even read this far.
So there you go, enjoy your morning at camp! What great camp coffee brewing methods did I miss?
-Mike




Add comment