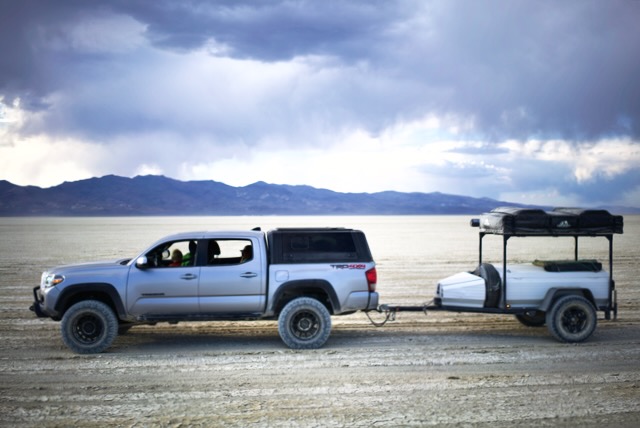
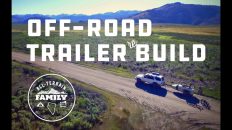
When you travel in the overland style, camping, driving, seeing the sights of the west, moving across the landscape like an explorer venturing into unknown lands, you need to bring enough with you that you can survive between resupplies be more or less comfortable doing it, without taking so much that you are encumbered by your burden of provisions and accessories. For everyone that line between prepared, and anchored, is a little different. Some travel light with slim shelter and minimal convenience, others travel in comparative luxury with full size expedition vehicles. Needs, and expectations are what they are. We’ve found a system that works well for us and it involves a minimally modified mid-size 4×4 and a small custom off-road trailer with a roof top tent.
The Trailer
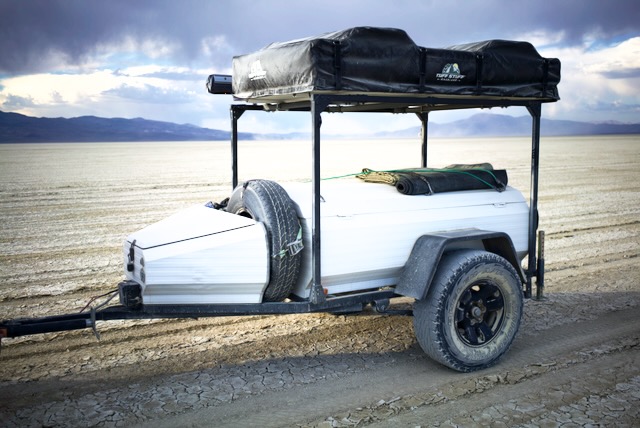
Family Overlanding Trailer
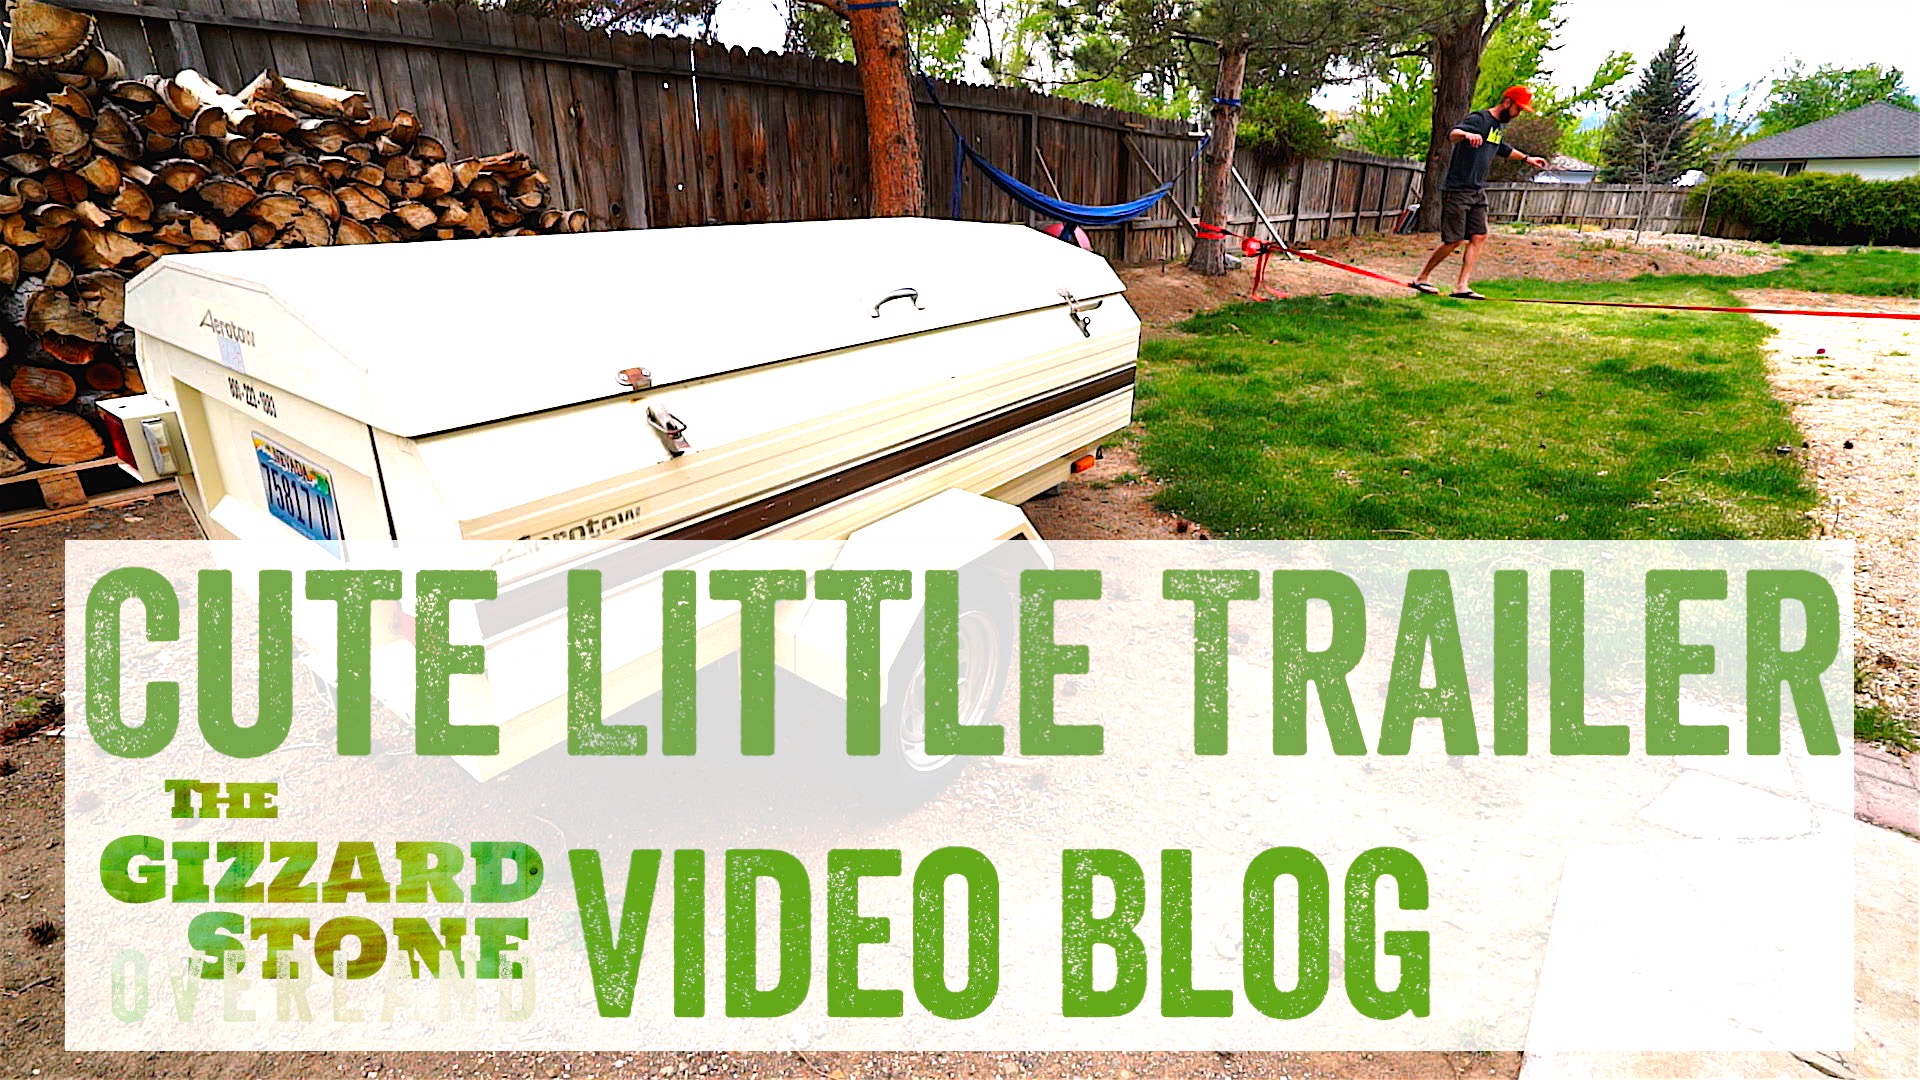
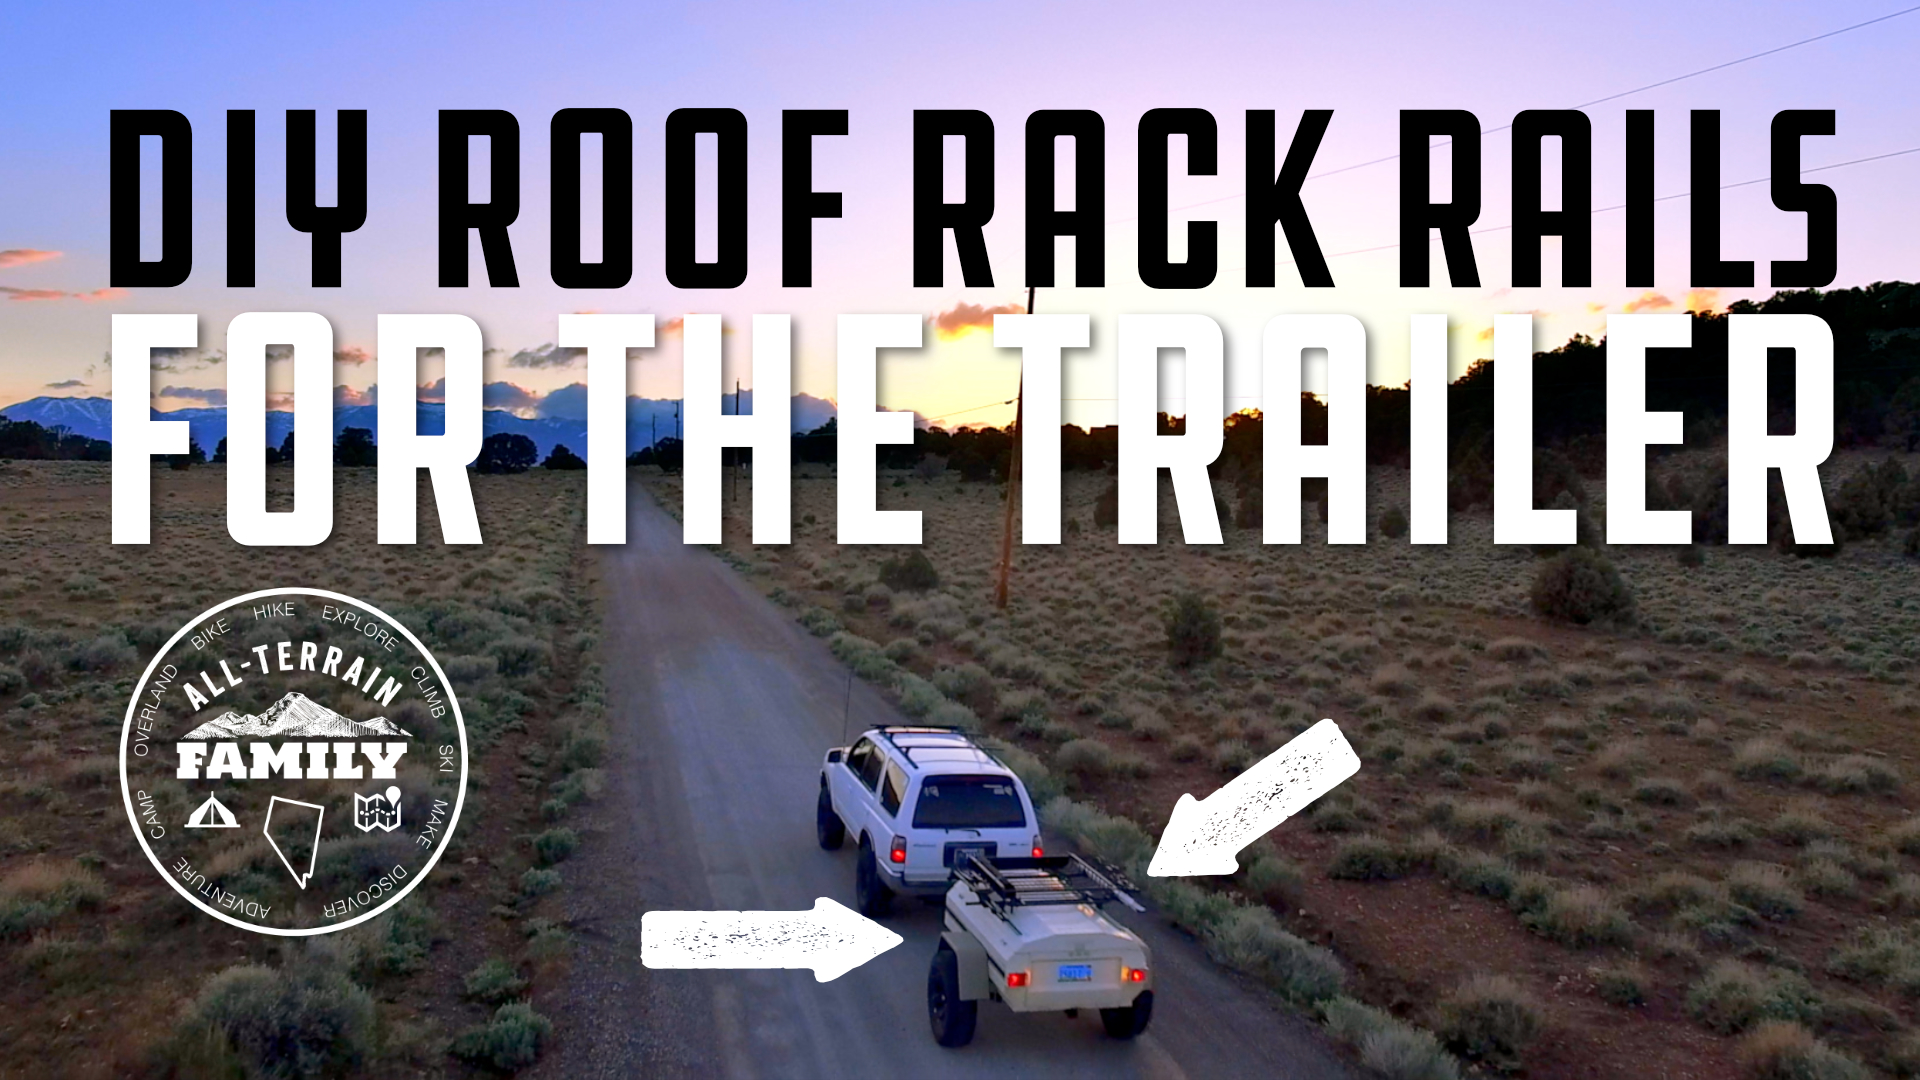
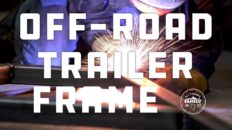
This trailer has been around for a while. If you want to know more about where it came from and how it got here, you can see the full list of posts and videos here. But here’s the elevator pitch. The trailer is a small steel cargo trailer that was sold under the name “Aerotow” in the ’80’s and ’90’s throughout the west. My parents bought it in about 1988 and it served as a family camping cargo carrier for our family for more than a decade. I acquired it in the early 2000’s and it served as a utility trailer. Then we started to need it it for taking our growing family camping and so I added a bigger axle with brakes and tires. Off-Road duty quickly surpassed the structural integrity of the trailer so Bradd Davidson and Dave Wiggins built a new frame for it with Tacoma Springs and shocks from Harry Wagner and some of my new design concepts. At that point it became a truly capable off road trailer. Finally I added a Compact Camping Concepts No-Weld trailer rack for a roof top tent and awning and the structure of the trailer was complete.
Today, our little off road trailer can go anywhere the Tacoma can go and cary everything we need to get there and back. This is not just hyperbole. It has done that and I have the video to prove it.
The Parlor
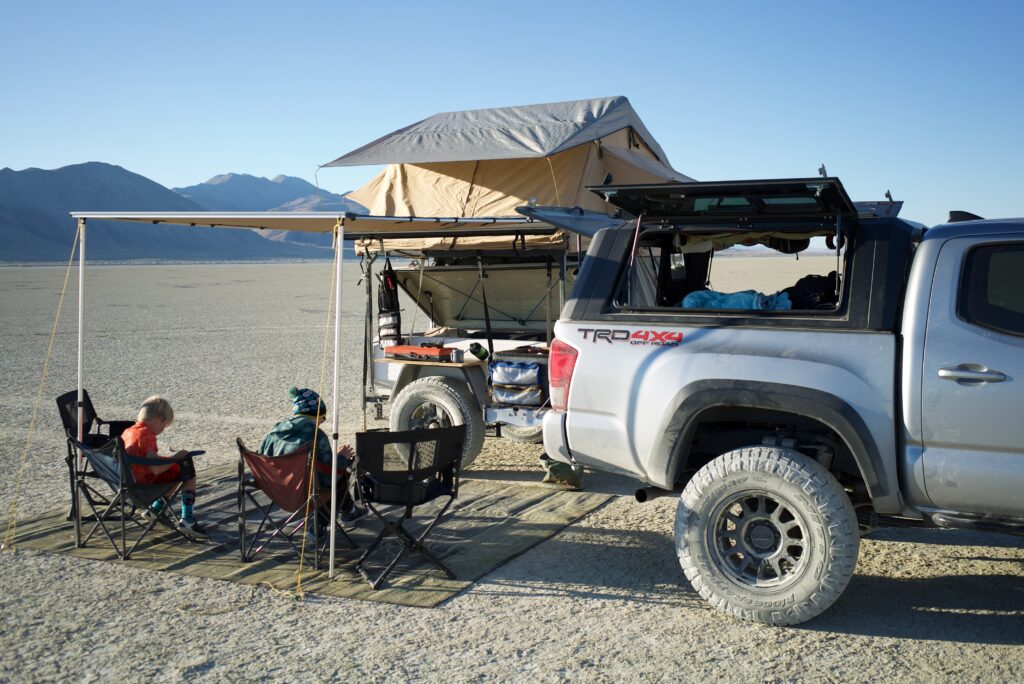
One of our favorite parts of camping is sharing time sitting around camp over a meal, a drink or a story. As such, the parlor of our overlanding camp setup is a highlight of the experience. Starting at the bottom, we lay out a large woven plastic sand mat. Ours is quite large, much larger than you usually find. The SAND MINE mat I found on amazon is 9′ x 12″ and is about the same size.
It’s nice in almost all situations to keep mud, dust, sand off our feet around camp. It gives us a place to sit on the ground, or place items on the ground without getting dirty. Sand and fine soil mostly goes through it, and water always drains right through. If it’s raining it keeps things much neater. When on the road, I fold the mat up and strap it to the outside of the trailer.
For seating, I keep two REI Co-op camp chairs. The REI Co-op Camp X Chair is the closest match to what we have. It’s the smallest, cheapest and for us the most comfortable chair we found. I keep two of those in the trailer all the time. I also have two Front Runner Expander Camping Chairs that I bought at Rack 2 Roam in Reno, NV. These are known in our family as the “overly complicated chairs” and the name is apt. They’re comfortable, but less slouchy than the REI chairs. They’re kinda fiddly to set up, but fold down to a very compact flat rectangle that fits well in the drawers I made for the tacoma where they live all the time. When we need it we also have an REI Co-Op Camp Roll Table.
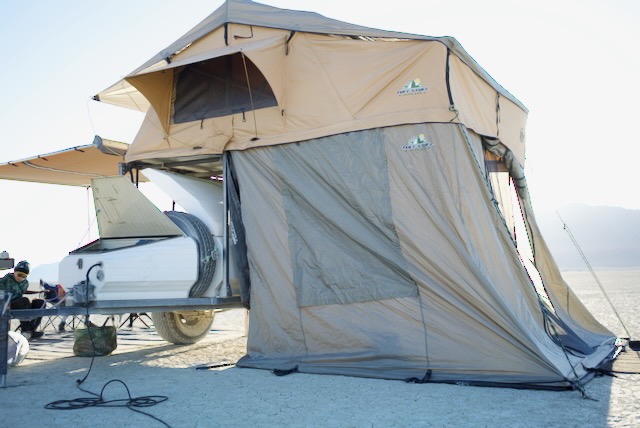
Above, providing shade and shelter we have an ARB Touring awning. This is about 6′ wide and extends out 8′ from the trailer. This provides nice shade and shelter from light rain. If rain get’s heavy, we lower the legs so that it doesn’t pool up. The awning is very useful when camped in sunny areas without natural shade. We’ve also enjoyed the rain shelter. The awning is quite nice to have, and I’m particularly happy it’s not on the truck because once deployed, we don’t have to pack it up to leave camp in the truck.
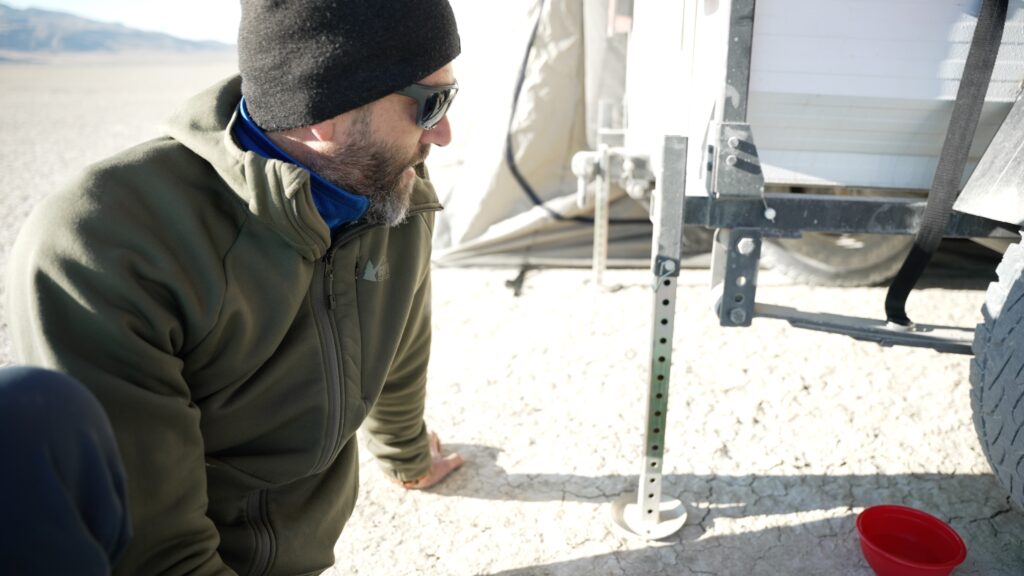
Leveling and Stabilizers
One thing nobody mentions when discussing the pros and cons of a roof top tent is the fact that if you’re on an off road truck with soft suspension and aired down tires, every movement you make 6 feet off the ground causes movement in the truck, and then is amplified by the height. When you or your partner or kids roll over in the night the swaying is annoying. To combat this I added some simple pinned stabilizers in the rear of the trailer. When we set up camp, I only need to un-hitch the trailer and lower it down on the front trailer jack. I then drop the rear stabilizers and raise the front until it’s all level. It still moves with our weight, but it’t not nearly as bad.
The Roof Top Tent
For shelter we have a Roof Top Tent and room from Tuff Stuff overland. The model we have is the Elite which is their largest tent. It’s not THE LARGEST tent available however. The 23Zero Walkabout 87 is larger by 10 inches. I found this one used on craigslist, but I kinda wish I had held off for the 23Zero. While the 77 inch wide Tuff Stuff Elite is big enough for us. That 10 inches would be nice to have.
The Room that attaches to the tent is nice to have for a place to change, store our bags and pen in the dog at night. It helps keep dirt out of the tent and provides additional shelter when it’s cold or the weather is bad.
The tent, like all roof top tents, is fiddly and reachy to set up. It’s not strenuous or hard per se, but it’s just fiddly and annoying to set up. The room in particular is fiddly to get zipped on as the slack in the zipper necessitates 3 hands.
This tent differs from our Thule Tepui in a couple of beneficial ways. First, the folding height is taller so that it accommodates more bedding to be left inside. Second, the cover is baggier which makes it easier to fit and zip up. Third, the mattress is slightly more comfortable. Not that much more comfortable, just slightly. Other than that, the design and construction is identical to all other similar roof top tents.
The Camp Kitchen
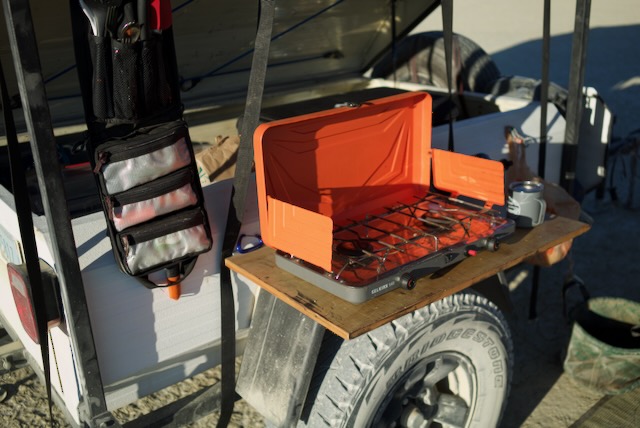
The kitchen of the trailer consists of a simple table that clips onto the side with a standard RV table clamp rail and is supported by the fender. This is just big enough to cook on and in most cases is all we need. For the proof of concept on this I made it out of cheap plywood, but my friend Don is making us a nice one out of hard wood.
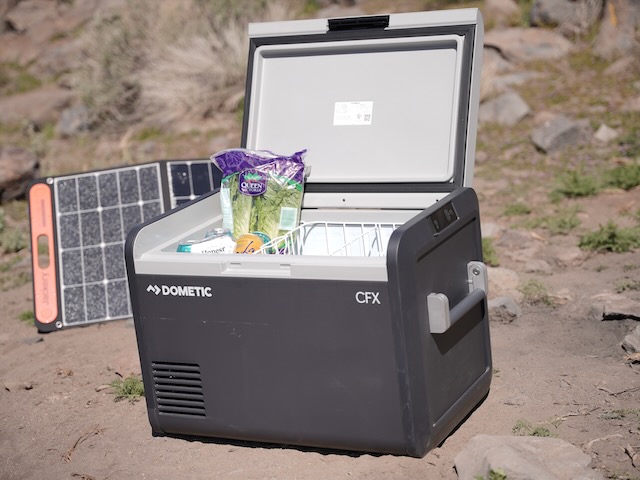
For cold food, we have a Dometic CFX3 55IM 12v fridge. This 55 quart fridge is big enough to handle out food needs for a week on the trail. It’s nice to not have to worry about ice, to be able to refrigerate leftovers, to cool drinks and generally have properly cool food on the trail. It has a large compartment with a basket and dividers, and a smaller tray above the compressor. The IM in the names is for Ice Maker. Which means there is a small compartment right above the compressor that can freeze two small ice trays. These trays hold enough ice for a small iced drink each. It can freeze it pretty quickly and you can re-freeze to make more. But there’s no where to store ice so you have to use it as you make it.
Water storage is in the form of a Frontrunner Water Jerry Can. This can holds 5 gallons and has a built-in spigot that we use as a simple gravity feed. The can comes with a simple plastic spigot, but I replaced that with a threaded brass nipple from Home Depot connected to a shut off valve with some vinyl tubing. I have a short section of tubing for while we’re in camp, and another section of tubing to keep the nipple clean while we’re under way. This is enough water for a weekend, but if we’re going to be out longer, or far away from water, I’ll usually cary extra in the trailer as well as the truck.
Power and Energy Storage
Fridges require a lot more power than you might think. This one Is rated at 1.11 Ah/h keeping the fridge cooled to 39 degrees in 90 degree weather. However, my experience is that in hot temperatures it consumes much more power than that. According to the readout on the ReBel battery app (see below) it consumes between 4 and 5 amps at 12v. That’s between 50 and 60 Watts.
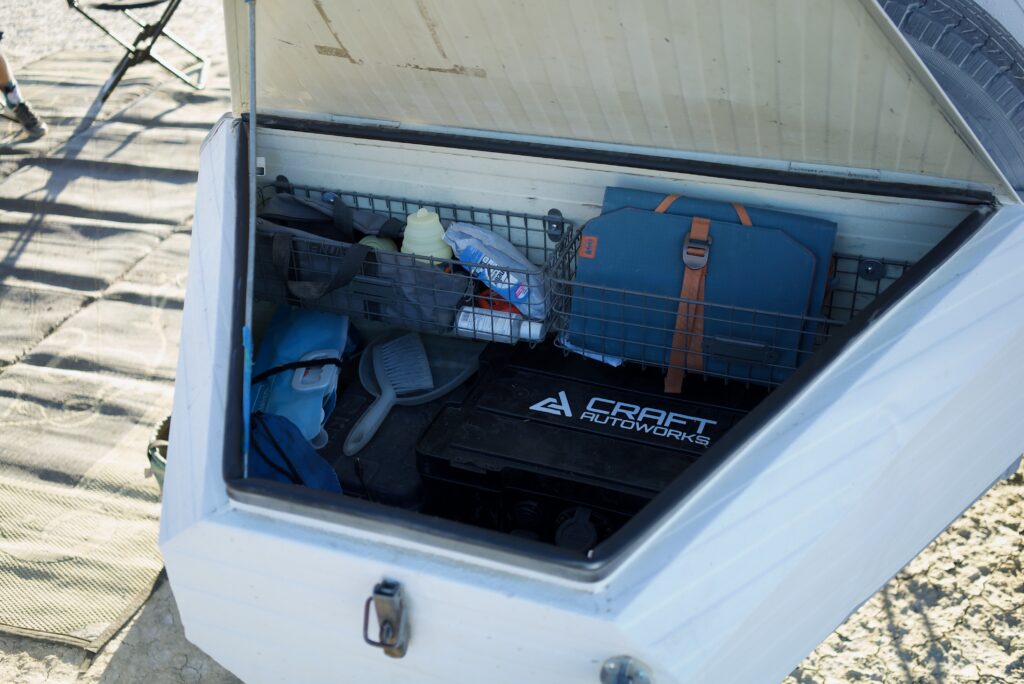
To supply that power we have an OES Compact from Craft Autworks. Craft Autoworks is a Reno based Camper Van builder that also makes several electrical components like their Overland Electrical Systems. These systems are complete electrical power storage and delivery units built into FrontRunner storage boxes. The OES Compact is built into the smaller Cub pack. I chose this unit because it fits easily into the trailer tongue box. This unit has a 50 Ah battery that is about half the capacity of what you’r normally see in an overlanding setup. at 12v that’s 600 Watt hours. So at full burn, with the measured draw of the fridge, It’ll power the fridge for 10 hours.
I’ve found that this unit can power the Dometic fridge for at least a full day in hot weather if it’s sheltered inside the trailer. It’ll go longer in cold weather. But eventually it runs short so there are two ways to charge this battery pack on the trail. The first is when hitched and connected to the truck, it can charge at 30 amps from the alternator via an ASE plug and the Kisae Charger. This is a much faster and more efficient way to charge batteries than a 12v DC socket which charges at much lower amperage.
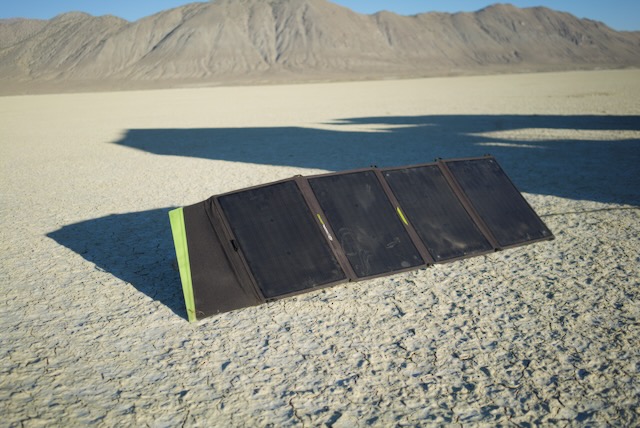
When not connected to the truck I have a Goal Zero Nomad 100 Solar Panel. This solar panel folds up compactly and stores in the front box when traveling. When we get to camp it sets up to display 4 small panels to the sun and can provide enough charge to keep the battery powering the fridge indefinitely. The Panel outputs power via a 8mm DC barrel connector which I extend with a 30 foot DC8 extension cable then convert to SAE with an DC8 to SAE adaptor.
Of course, I could use the inverter that the Tacoma came with from the factory. But the Genius charger is only rated for 5 amps, and that barely keeps up with the fridge. The solar panel is a better power source as it charges at a higher voltage.
This setup is good for powering the fridge as well as charging various devices and lights. I plan to add some 12v LED strips to the trailer for permanent lighting and will power those from the same battery as well.
Camp Setup
It’s pretty easy for us to pull off into a camp site, and get set up without too much effort and have a really nice and comfortable camp in a few minutes. If we have a good part of the day to spend at camp, I’ll usually start by unhitching the truck and reposition it for better access from under the awning. In many cases, it also provides additional shelter from the afternoon sun. I keep dry food in the truck so having easy access to that is nice.
Then we’ll deploy the awning if we’re in a place that needs shade. Rocket takes care of getting it staked down. It’s really important to do that in case of wind. Lightning Dragon can get the solar panel set up. We keep the sand mat and a door mat strapped to the outside of the trailer and those go out next while I get the tent and room set up.
All in all full set up takes less than half an hour. It’s much more work to get our ground tent system set up, and even more to get it put back away.
TRAILER COUPLING
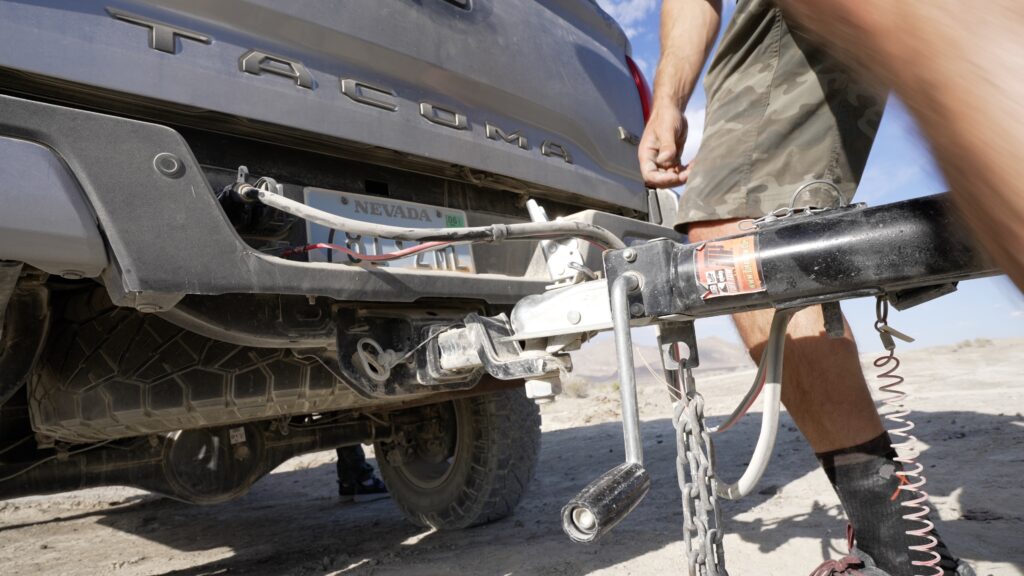
Hitching up the trailer is a simple matter, but there are some important steps. Namely all of them. First I lower the trailer down and raise the rear stabilizers. Then I raise the front and move the truck into place, which is easy with the rear camera. Then I lower it onto the receiver ball. Right away I pull the pin and mount the jack sideways for travel. You only have to forget this step once.. Then I connect the ASE plug for the 30 amp charging of the trailer battery followed by the 6 pin connector for the trailer lights and brakes. Next is the safety chain, which is short enough not to drag and spark on the ground. This trailer, though light, has brakes which is very nice. As such it has a break away system. There’s a cable that attaches to the truck. If that separates the system locks up the trailer brakes independently.
Then we hit the road to the next adventure.
Thanks for checking out this overview of out overlanding trailer setup. If you have any questions or comments I’d love to hear them.
If you’ve followed this channel for a while, you’ve surely noticed our rare, and increasingly unique camping trailer. It began live three decades ago...


Add comment